
How to Stay Connected Abroad With eSIM: 7 Insider Travel Hacks for Effortless Global Communication
Ever landed in a new country and immediately started stressing about finding Wi-Fi or chasing down a local SIM card? Yeah, we’ve all been there. These days, eSIM technology makes staying connected abroad so much easier—you can skip the SIM card scavenger hunt and just connect to local networks right from your phone. Honestly, it’s been a game changer for me. No more digging for that tiny SIM tool at the bottom of my backpack.
You can grab an eSIM plan before you even leave home, or snag one on the go, and set it up in just a few taps. That means you keep your home number, control your costs, and get to focus on your trip.
Table of Contents
- Key Takeaways
- Understanding eSIM Technology
- What Is an eSIM and How Does It Differ from a Physical SIM Card
- Benefits of Using eSIMs for International Travel
- How eSIMs Enable Seamless Connectivity Abroad
- How to Set Up and Activate eSIMs for Travel
- Checking Device Compatibility with eSIM
- Getting an eSIM from Providers and Carriers
- How to Scan a QR Code to Install Your eSIM
- Step-by-Step eSIM Activation Process
- Choosing the Right eSIM Provider and Plan
- Comparing eSIM Providers: Airalo, Holafly, and GigSky
- Evaluating Coverage and Speed for International Travelers
- Understanding eSIM Data Plans and Local Coverage
- Managing Costs and Avoiding Roaming Charges
- How eSIMs Help Avoid Roaming Fees
- Cost Savings versus Physical SIM Cards
- Tips for Selecting a Cost-Effective Travel eSIM
- Using Dual SIM and Multiple eSIM Profiles
- Enabling Dual SIM Mode on Your Device
- Switching Between eSIM and Physical SIM Cards
- Managing Multiple Profiles for Frequent Travelers
- Ensuring Security and Privacy When Using eSIM Abroad
- Security Features of eSIM Technology
- Protecting Data and Staying Safe on Mobile Networks
- Common Issues and Troubleshooting with eSIMs
- Troubleshooting eSIM Activation Problems
- Network or Coverage Issues While Abroad
- Getting Support from Your eSIM Provider
- Frequently Asked Questions
- What steps are involved in activating an eSIM on my iPhone before international travel?
- Can you recommend the best eSIM providers for globetrotters looking to stay connected across multiple countries?
- Is it necessary to enable data roaming to utilize an eSIM while abroad, and are there any associated risks?
- How can I maintain my current number and service when switching to an eSIM during my travels?
- Are there specific strategies to avoid incurring roaming charges when using an eSIM in a foreign country?
- What should I consider when selecting an eSIM for seamless connectivity throughout Europe?
- Book Your Dream Experience
- More Travel Guides
Key Takeaways
- eSIMs make international connectivity way simpler and more flexible.
- Setup is quick, and you never have to fumble with a physical SIM card.
- Planning ahead helps you dodge extra fees and keeps your data safer.
Understanding eSIM Technology

Traveling doesn’t have to mean wandering the airport looking for someone selling SIM cards or crossing your fingers that the hotel Wi-Fi isn’t a nightmare. eSIMs have totally changed the travel game, letting you stay connected almost anywhere without hassle. You get more control, more flexibility, and honestly, one less thing to misplace.
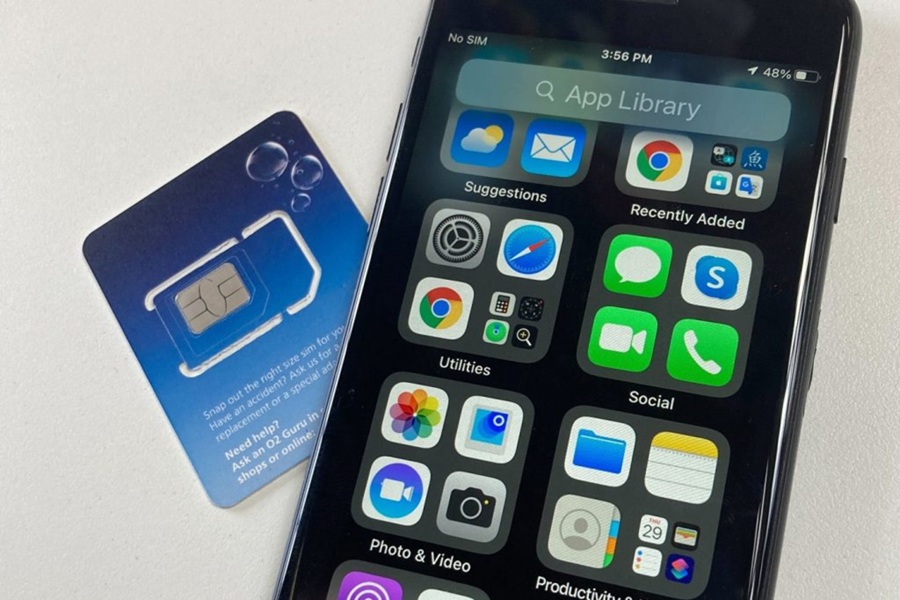
What Is an eSIM and How Does It Differ from a Physical SIM Card
An eSIM (that’s “embedded SIM”) is a tiny chip built right into most modern smartphones. Unlike those old-school SIM cards, you can’t pull it out or move it between devices. Instead, you just download your mobile plan straight to your phone, usually with a QR code or via an app.
The digital SIM sits inside your phone, letting you add multiple plans or bounce between networks without hunting for a paperclip. Most new iPhones, Samsung Galaxy phones, and Google Pixels support eSIM. I still remember trying to jam the wrong-sized SIM into my phone at a train station in Italy—never again.
Physical SIM cards are fading out. No more fiddling with trays or losing those tiny cards—just a couple of taps and you’re good. You can even keep your regular number active (super helpful for bank texts) while using your eSIM for data abroad.
Benefits of Using eSIMs for International Travel
eSIMs just make travel easier, full stop. You can skip the airport kiosk lines and avoid those overpriced tourist SIMs. Buy and activate a plan before you leave, and you’re set the moment you land.
Dual SIM support is a lifesaver. Stay reachable on your home number and use a local or global data plan at the same time. That way, you don’t miss family texts and still have cheap data for train schedules, translations, or showing off your gelato on Instagram.
Security gets a boost, too. Using your own connection instead of public Wi-Fi keeps your info safer, especially in airports or crowded cafes. eSIM plans are usually more flexible—you can buy data for just the days you need, or hop between cities without skipping a beat.
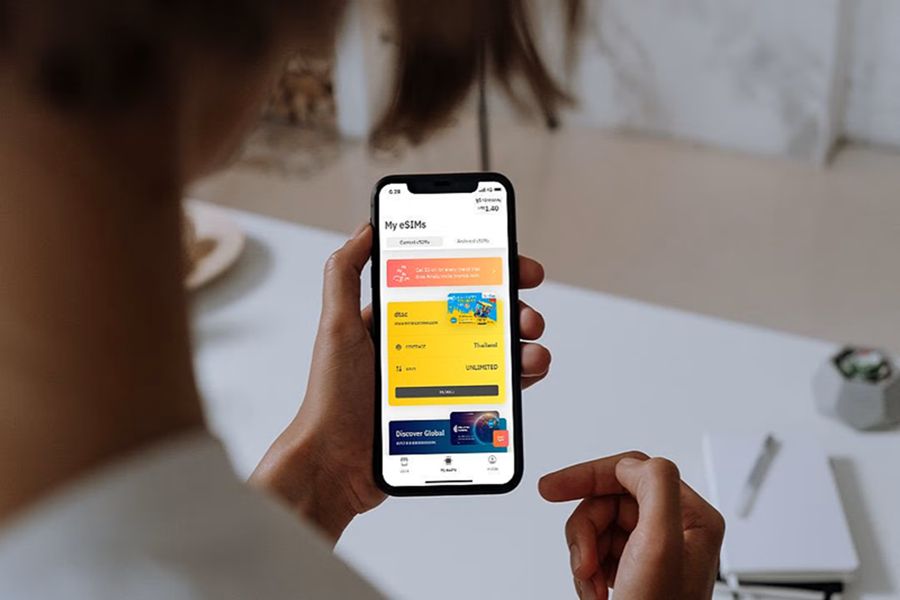
How eSIMs Enable Seamless Connectivity Abroad
Getting connected abroad used to be such a pain, but eSIMs really smooth things out. Once you set it up, you can switch plans or upgrade your package in minutes, all from your phone—no lines, no awkward conversations, no problem.
I’ve landed in Tokyo, Amsterdam, and just opened my eSIM manager. No panic, no stress, just instant local data. If you’re the spontaneous type or have a long layover, being able to buy a plan for a few days—or even hours—is a huge win.
Seamless connectivity means you don’t lose access to maps, rideshares, or mobile payments as you cross borders. If you travel a lot, you can keep multiple eSIM profiles and just toggle between them. It’s almost set-and-forget—except when you need to check your data balance because you went a little wild with food pics.
How to Set Up and Activate eSIMs for Travel
Setting up an eSIM for travel isn’t nearly as intimidating as it sounds. Just check your phone, pick a provider, follow a few steps, and you’re ready to roam.
Checking Device Compatibility with eSIM
Not every phone supports eSIMs, which can be a letdown if your device is a bit older. Most newer Apple iPhones (from XR and XS onward), Samsung Galaxy models, and Google Pixels have eSIM support, but not every version does.
Usually, you’ll find this in your phone’s settings. On iPhones, go to Settings > Cellular and see if there’s an option to add a plan. On Android, check under Network & Internet > Mobile Network. If you don’t see it, your phone likely isn’t compatible.
People sometimes ask me about work phones or budget Androids. Honestly, cheap phones usually skip eSIM support, even if they’re new. It’s always worth double-checking.
Here’s a quick table for reference:
| Brand | eSIM Compatible Models |
|---|---|
| Apple iPhone | XR, XS, 11, 12, 13, 14, 15 and newer |
| Google Pixel | Pixel 3 and newer |
| Samsung Galaxy | S20, S21, S22, S23, S24, Note 20, Z Flip, Z Fold and newer |
Getting an eSIM from Providers and Carriers
Once you’ve confirmed your device is ready, it’s time to pick a provider. There are tons out there—Airalo, Holafly, and GigSky pop up a lot for travel eSIM.
The process goes like this: visit the provider’s site or app, choose a plan for your destination, and buy it. Some major carriers offer eSIMs for travel too, but I find their prices aren’t usually as competitive as the indie providers.
Pay attention to the plan details—some are data-only, some include calls or texts. Make sure your phone model and region are supported. And double-check the activation date. I once activated mine a day early and burned a whole day of data before I even landed (rookie mistake).
How to Scan a QR Code to Install Your eSIM
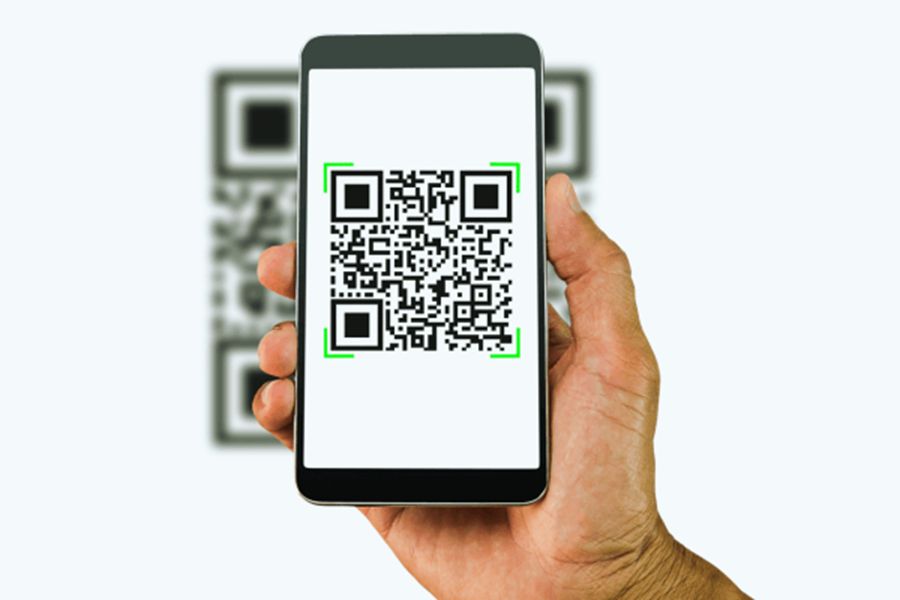
This part sounds technical but honestly, it’s easy. After buying your eSIM, the provider will email or show you a QR code (sometimes plus an activation code). That’s your ticket to adding the new plan.
On iPhone, head to Settings > Cellular > Add Cellular Plan. On Android, go to Settings > Network & Internet > SIMs or Mobile Network > Add carrier. When prompted, scan the QR code with your camera.
If your phone asks for an activation code, just copy and paste what the provider sent. (Seriously, don’t delete that email—you might need it again.)
You’ll usually need Wi-Fi to do this. Some airports or hotels have painfully slow Wi-Fi, so if possible, do it before you leave home or in a spot with decent internet.
Step-by-Step eSIM Activation Process
Let’s break it down. Setting up your travel eSIM usually looks like this:
- Buy your eSIM plan from a travel eSIM provider or carrier.
- Get the QR code and any activation info by email or on-screen.
- Open your phone’s settings and tap Add eSIM or Add Cellular Plan.
- Scan the QR code using your camera. Enter any activation code if needed.
- Choose your plan settings. Most phones ask if you want to use the new eSIM for data, calls, or texts. Usually, you’ll pick data only for travel eSIMs.
- Turn on your eSIM line. Activate it so your plan kicks in.
If you’re running dual SIMs for work and personal, you can swap between eSIMs in settings. If things get weird, removing and reinstalling the plan usually fixes it. And if you have multiple country profiles, you can store them all and just toggle as you go. Pretty handy.
Choosing the Right eSIM Provider and Plan
Picking the right eSIM provider isn’t always straightforward—there are a ton of options and they all start to blur together. You don’t want to end up with terrible coverage halfway up the Alps or waste money on data you’ll never use. It pays to look closely at the top names, their plans, and what actually works for travelers.
Comparing eSIM Providers: Airalo, Holafly, and GigSky
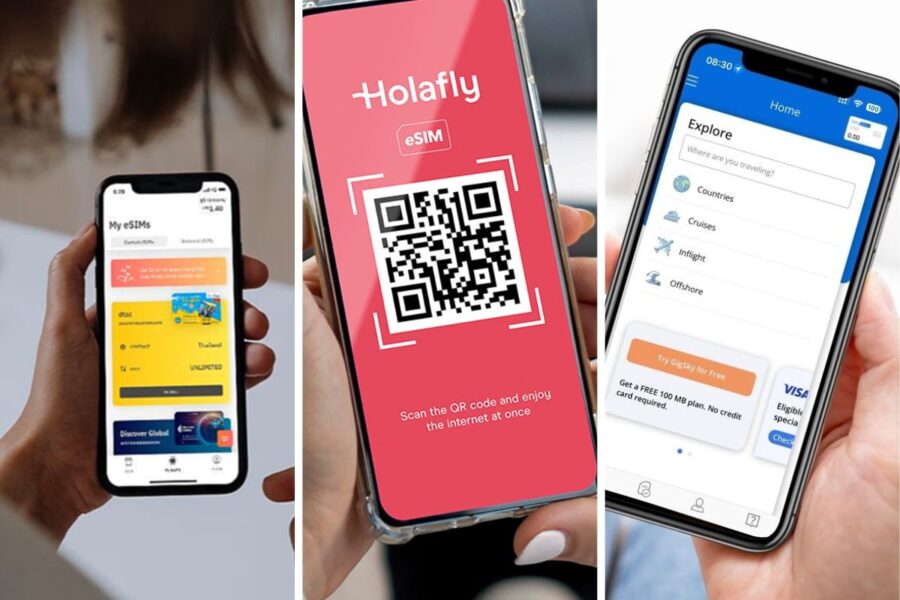
Let’s be honest—there’s a sea of eSIM providers, but for travelers, Airalo, Holafly, and GigSky stand out the most. They all cover lots of countries, but each has a sweet spot.
- Airalo is usually the cheapest and super straightforward. I use their app for quick, multi-country trips.
- Holafly is great if you want unlimited data (with some fair use limits). It’s solid for long trips in one country, and their support team actually helps—surprisingly rare!
- GigSky covers some places the others don’t, and it’s my pick for business trips where I can’t risk spotty service. It costs a bit more but the reliability is worth it.
Here’s a quick comparison table:
| Provider | Best For | Standout Feature |
|---|---|---|
| Airalo | Short trips, many stops | Budget-friendly |
| Holafly | Longer stays, unlimited | Easy, unlimited data |
| GigSky | Business, rare regions | Broad network choices |
Don’t just grab the cheapest plan if you really need your data. Sometimes paying a bit more saves you a lot of headaches.
Evaluating Coverage and Speed for International Travelers
You can’t just go by the brand name—coverage and speed really matter. Even the big providers like Airalo or Holafly piggyback on local networks, so your experience can swing wildly, even within the same city.
I learned the hard way in Japan that some eSIMs can’t keep up with the big local players like NTT DoCoMo, especially outside the cities. You want a provider that partners with top local networks, not some random bargain option.
Check forums, look at coverage maps, or ask locals online before you buy. Sometimes you think you’re getting 4G, but end up crawling on 3G in the countryside (been there). Pick a provider that tells you exactly which networks you’ll use, or that partners with Tier 1 operators.
And don’t get too excited about “unlimited data.” Most unlimited plans start throttling your speed after you hit a certain amount, so watch out for those sneaky fair use rules.
Understanding eSIM Data Plans and Local Coverage
Here’s where it gets a bit geeky, but it matters: not every data plan is the same. Some are regional (covering a whole continent), some are local (just one country), and a few are global—which usually costs the most.
If you’re bouncing around Europe, an “EU regional” eSIM is usually cheaper than buying country-specific plans for each stop. But if you’re chilling in Greece for two weeks and not going anywhere else, a local plan will save you money and probably give you faster speeds.
Be aware: prepaid eSIM users sometimes don’t get access to the fastest networks or all the bands that locals do. It feels a bit unfair, but that’s how it goes. Always check the fine print or look up real traveler reviews.
If you’re nervous about running out of data, pick a provider that lets you top up easily through their app. The best plan balances fair data, strong coverage, and no ugly surprises. I’ve seen too many travelers stranded at the airport with a dead phone—usually because they didn’t read the details or misunderstood their plan. Don’t be that person.
Managing Costs and Avoiding Roaming Charges
Nobody wants to come home from a trip only to find a jaw-dropping phone bill waiting. If you plan ahead, you can dodge extra costs and keep your focus where it belongs—on the adventure, not your carrier’s fine print.
How eSIMs Help Avoid Roaming Fees
Honestly, we’ve all heard a horror story about someone getting slammed with roaming charges after just a few minutes of scrolling abroad. Carriers love to default to international roaming, and every little bit of data outside your home network gets tallied up.
eSIMs flip the script. Instead of sticking to your home plan, you jump onto a local or regional provider right from your device. With a travel eSIM, you get a separate data plan, so your original SIM just sits quietly, not racking up fees in the background.
No more fumbling with SIM trays or panicking over a lost nano SIM in your hotel room (seriously, who hasn’t done that?). I spent two weeks in Japan, toggling between Wi-Fi and my eSIM with zero hassle. Stayed in touch, barely spent anything, and didn’t see a single roaming charge. Total relief.
Cost Savings versus Physical SIM Cards
I’ve done the thing where you land, then dash around the airport or city looking for a SIM card shop. Sometimes, physical SIMs are cheap, but it’s often a hassle—shops close early, staff might not speak your language, or you get tripped up by random ID rules.
eSIMs just cut out all that noise. You buy and activate online, sometimes even before you leave home. No airport markups, no desperate ATM withdrawals, and you can compare plans with a few clicks. If you travel a lot, you won’t end up with a graveyard of forgotten SIM cards.
One caveat: in super remote spots, a physical SIM might get you better coverage. But honestly, for most destinations, eSIMs are the easier, smarter play—especially if you take a few minutes to research before you go.
Tips for Selecting a Cost-Effective Travel eSIM
Here’s my personal checklist for a travel eSIM that won’t let you down:
- Check coverage: Not every eSIM works everywhere. Dig into reviews or app store ratings to be sure your destination’s covered.
- Compare data packages: Some plans are stingy, others generous. Figure out what you’ll actually use—don’t pay for a mountain of data if you’ll just be using maps and WhatsApp.
- Read the fine print: Throttled speeds or sneaky fees are the worst. Look for any catches before you buy.
- Double-check device compatibility: Only newer phones support eSIM. Don’t assume—Google your model first.
- Ask about top-ups: Some plans let you add data on the fly, right from their app. Super handy.
If you’re bouncing between countries, consider a regional or global eSIM. One plan for multiple borders? That’s the kind of lazy-smart travel hack I can get behind.
Using Dual SIM and Multiple eSIM Profiles

Jumping between countries can make managing your main number and local data a headache. With the right Dual SIM settings and eSIM profiles, you can keep up with work, family, travel plans, and those random bank texts—without missing a beat.
Enabling Dual SIM Mode on Your Device
If you’ve ever noticed two signal bars on your phone, congrats—you’ve probably got Dual SIM capability. Most newer phones let you use a physical SIM and an eSIM together, or even two eSIMs if you’re fancy (looking at you, iPhone 13+ folks).
Just head into your SIM Manager or mobile settings, and you’ll find options to enable Dual SIM or DSDS mode. It’s easier than you’d think. The first time I toggled between my U.S. line and a travel eSIM in Canada, I felt like I’d unlocked a secret feature.
Label your numbers clearly. Trust me, you don’t want to call your dentist from your Tokyo number by mistake.
Switching Between eSIM and Physical SIM Cards
Switching between a physical SIM and eSIM isn’t just for tech geeks. Most people can do it in a minute. On iPhones and many Androids, you add the eSIM profile with a QR or activation code, then pick which SIM handles data, calls, and texts.
I once swapped from my physical SIM to a local eSIM at a packed Spanish train station, one hand on my backpack, the other on a baguette. Done in under a minute, baguette survived. Keep a SIM tray tool handy, but usually, you won’t need it.
You can flip which line is “primary” for data anytime. For example:
- SIM 1 (U.S. number): for calls/texts from home
- eSIM (local data): for cheap internet
Switch as needed and stay connected everywhere. It’s honestly the best of both worlds.
Managing Multiple Profiles for Frequent Travelers
If you’re hopping between countries or cities, storing multiple eSIM profiles is a lifesaver. Most decent phones hold at least five; some Pixels and Samsungs hold even more.
You can only run two lines at once, but swapping profiles is simple—no more fiddling with tiny cards. Label each profile (“Italy Data,” “Dubai Work sim,” etc.) to avoid confusion, especially when jet lag hits.
Set your main number for calls, but run data through the local eSIM with the best deal. If you’re a frequent traveler, learning these menus saves a ton of time and money. Honestly, it’s one of my favorite travel hacks.
Ensuring Security and Privacy When Using eSIM Abroad

Using an eSIM while traveling can keep your connections safer, but it’s not a magic shield. You’ve got to pair eSIM’s built-in security with smart habits to really protect your info on the road.
Security Features of eSIM Technology
eSIMs are built into your phone, so you don’t have to swap tiny cards at airports or random kiosks. What I like is that eSIM profiles are tied to your device—makes it much harder for someone to steal your plan and rack up charges.
If you lose your phone, nobody can just pop your eSIM into another device. Usually, they’ll need your password or biometrics to activate new plans or switch profiles. That’s a solid layer of security that physical SIMs just can’t match.
Still, don’t get too comfortable. If you haven’t locked your screen or set up Face ID or a strong PIN, that’s a weak spot. Always keep your device locked and install every security update—they’re more important than you think.
Protecting Data and Staying Safe on Mobile Networks
Just because you’re not joining sketchy public Wi-Fi doesn’t mean every mobile network is squeaky clean. With eSIMs, you’re piggybacking on local carriers, which is usually fine, but some countries have weaker privacy protections.
Set strong passwords for your eSIM accounts—please, no “fluffy123.” Two-factor authentication is a hassle when you’re jet-lagged, but it’s worth it. And yes, actually read the privacy policy before buying from a no-name digital SIM provider. Some log way more data than you’d expect.
Here’s a checklist I wish someone had handed me years ago:
- Always lock your phone (fingerprint, PIN, or face).
- Use unique passwords for your mobile data accounts.
- Turn on automatic software updates.
- Don’t use “open” cellular plans from sketchy third parties.
- Watch for notifications about unknown devices accessing your eSIM.
Layer your security and you’ll travel with way less stress. More time for real exploring, less time worrying about your info leaking out.
Common Issues and Troubleshooting with eSIMs

Even with a solid eSIM plan, things go sideways sometimes. Maybe your phone won’t connect, or you get an error just when you need to check in for your flight. I’ve definitely sat in airports, poking at my phone, hoping my eSIM would finally cooperate.
Troubleshooting eSIM Activation Problems
Activation is where most people hit their first snag. You scan the code, but nothing happens. Or you get a cryptic “invalid QR” message. Before you panic, check if your phone actually supports eSIM—this gets missed all the time. On my last trip to Rome, my friend spent ages troubleshooting before realizing her phone was just too old.
Try these:
- Make sure your device software is up to date. Outdated iOS or Android versions can mess with eSIMs.
- Double-check you’re scanning the right QR code. Sometimes providers send a few codes—make sure it’s the activation one.
- Restart your phone after scanning. Seriously, this fixes most activation headaches.
If you got your eSIM by email, copy and paste the activation code exactly. I’ve wasted half an hour mixing up zeros and capital Os. Rookie mistake.
Network or Coverage Issues While Abroad
So, your eSIM is active but you’re still offline? Frustrating. Sometimes, your provider just doesn’t have a strong partner network in the country. When I was in rural Vietnam, I learned this the hard way.
A few things to try:
- Open your network settings and manually pick a local carrier instead of leaving it on auto.
- Make sure mobile data is actually turned on for your eSIM line.
- If you see “no service” or a weak signal, move somewhere more open. Airports and subways can be dead zones.
Quick reference:
| Step | What to Do |
|---|---|
| No internet | Switch airplane mode on/off |
| Still nothing | Restart phone, check coverage |
| Weak coverage | Try a different network partner |
If you’re still stuck, maybe your data plan ran out or your eSIM isn’t set as the primary data line.
Getting Support from Your eSIM Provider
When all else fails, reach out to your eSIM provider’s support. Most have live chat or WhatsApp now, which is a lifesaver. Don’t just say “help!”—send screenshots and list what you’ve tried. It speeds things up.
Check their help center or FAQ before you get frustrated. I once fixed a glitch in Morocco just by skimming the troubleshooting page.
Keep your activation code and provider details handy for any support ticket. If you bought through a reseller, contact them—not the main carrier. Learned that the hard way!
Frequently Asked Questions
Setting up eSIMs for travel can feel a bit overwhelming, especially the first time. After bouncing between continents and fighting with spotty airport Wi-Fi, I’ve picked up a few hard-earned tricks for keeping your phone online—and your wallet mostly intact.
What steps are involved in activating an eSIM on my iPhone before international travel?
First things first—make sure your iPhone actually supports eSIM. If you’re using an XS or anything newer, you’re set.
Before you even think about heading to the airport, grab the eSIM profile from your provider. Most providers will email you a QR code—just open your camera and scan it in the “Add Cellular Plan” section under Settings.
Always do this while you’re still on Wi-Fi. Trust me, trying to set up an eSIM in an airport lounge or, worse, on the plane? It’s a recipe for frustration (and sometimes a surprisingly expensive one). I’ve fumbled with this before, and prepping ahead has saved me more than once.
Can you recommend the best eSIM providers for globetrotters looking to stay connected across multiple countries?
Honestly, there are so many choices it can feel overwhelming. Airalo stands out, especially if you’re hopping between countries—they cover more than 200 places, and their app makes it simple to see what’s included.
Nomad and Holafly also offer multi-country plans that are worth a look. I’ve relied on Airalo a few times, and topping up on the go is painless.
Just don’t assume every “Europe” plan covers every European country. I made that mistake in Turkey and ended up wandering around Istanbul at midnight, desperately hunting for Wi-Fi.
Is it necessary to enable data roaming to utilize an eSIM while abroad, and are there any associated risks?
Usually, you’ll need to switch on data roaming for the eSIM to connect to networks overseas. That by itself won’t wreck your bank account—as long as you keep your main SIM’s roaming firmly off.
Only the eSIM should have data roaming enabled, or you risk your home carrier quietly racking up charges. I always triple-check which SIM is active for data, mostly because I’m a bit paranoid.
Turn off automatic network switching so your phone doesn’t sneak back to your main SIM’s pricey plan. Every time I land, I go through my settings just to be sure.
How can I maintain my current number and service when switching to an eSIM during my travels?
If you want to keep your usual number for texts and calls, don’t remove your main SIM. Just switch the eSIM to handle data, and let your physical SIM (or main eSIM) stay active for calls.
On my last trip, my friends could still text my regular number, but I routed WhatsApp and data through the travel eSIM.
Sometimes, dual-SIM setups throw a curveball with things like iMessage or call routing. It’s smart to do a test run with someone at home before you fly out.
Are there specific strategies to avoid incurring roaming charges when using an eSIM in a foreign country?
Definitely—first, turn off data roaming on your home SIM. Then, make your travel eSIM the default for mobile data and calls.
Delete or deactivate any old data plans in your phone’s settings so you don’t accidentally connect to something expensive. I always flip on airplane mode when swapping SIMs, then enable just the eSIM.
Watch out for those sneaky system updates—sometimes they try to reconnect your original line at the worst possible moment. I’ve learned to check after every update, just in case.
What should I consider when selecting an eSIM for seamless connectivity throughout Europe?
Start by hunting down providers that offer true “Europe regional” plans—not just a single-country option dressed up with a fancy name. Double-check the list of included countries, because, surprisingly, some “Europe” plans skip a few key spots.
Honestly, I’ve dodged a lot of hassle at border crossings thanks to regional eSIMs from Airalo and Nomad—no more frantic searches for SIM shops in unfamiliar train stations.
Keep an eye on data speed restrictions and those sneaky fair usage policies. I’ve noticed that the cheaper plans often throttle your speed after just a few gigabytes. For me, it’s worth spending a little extra to keep Google Maps and translation apps running smoothly, especially since getting lost is basically a travel tradition at this point.